
Install gks ERP
Before install
Things you should know about the installation process.
During the installation process, the following will happen:
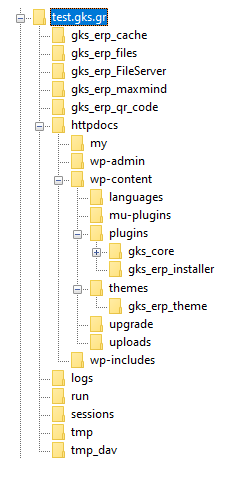
- In the WordPress public folder (usually httpdocs), a folder named my will be created, containing various PHP, JS, CSS, PNG, JPG, and other files.
- The gks_core plugin will be installed.
- The mu-plugin gks_core_plugin_mu.php will be installed.
- The gks_erp_theme theme will be installed
- The following folders will be created in the parent WordPress installation directory:
- gks_erp_cache
- gks_erp_files
- gks_erp_FileServer
- gks_erp_maxmind
- gks_erp_qr_code
- tmp
- tmp_dav
- Over 500 tables with the prefix gks_ will be created in the database.
- Some new fields will be added to the users table.
- Three triggers will be added to the usermeta table
Install
Download the file gks-erp-installer.zip from link:
https://www.gks-erp.com/files/gks-erp-installer.zip
This is the installer for gks ERP, a plugin for WordPress.
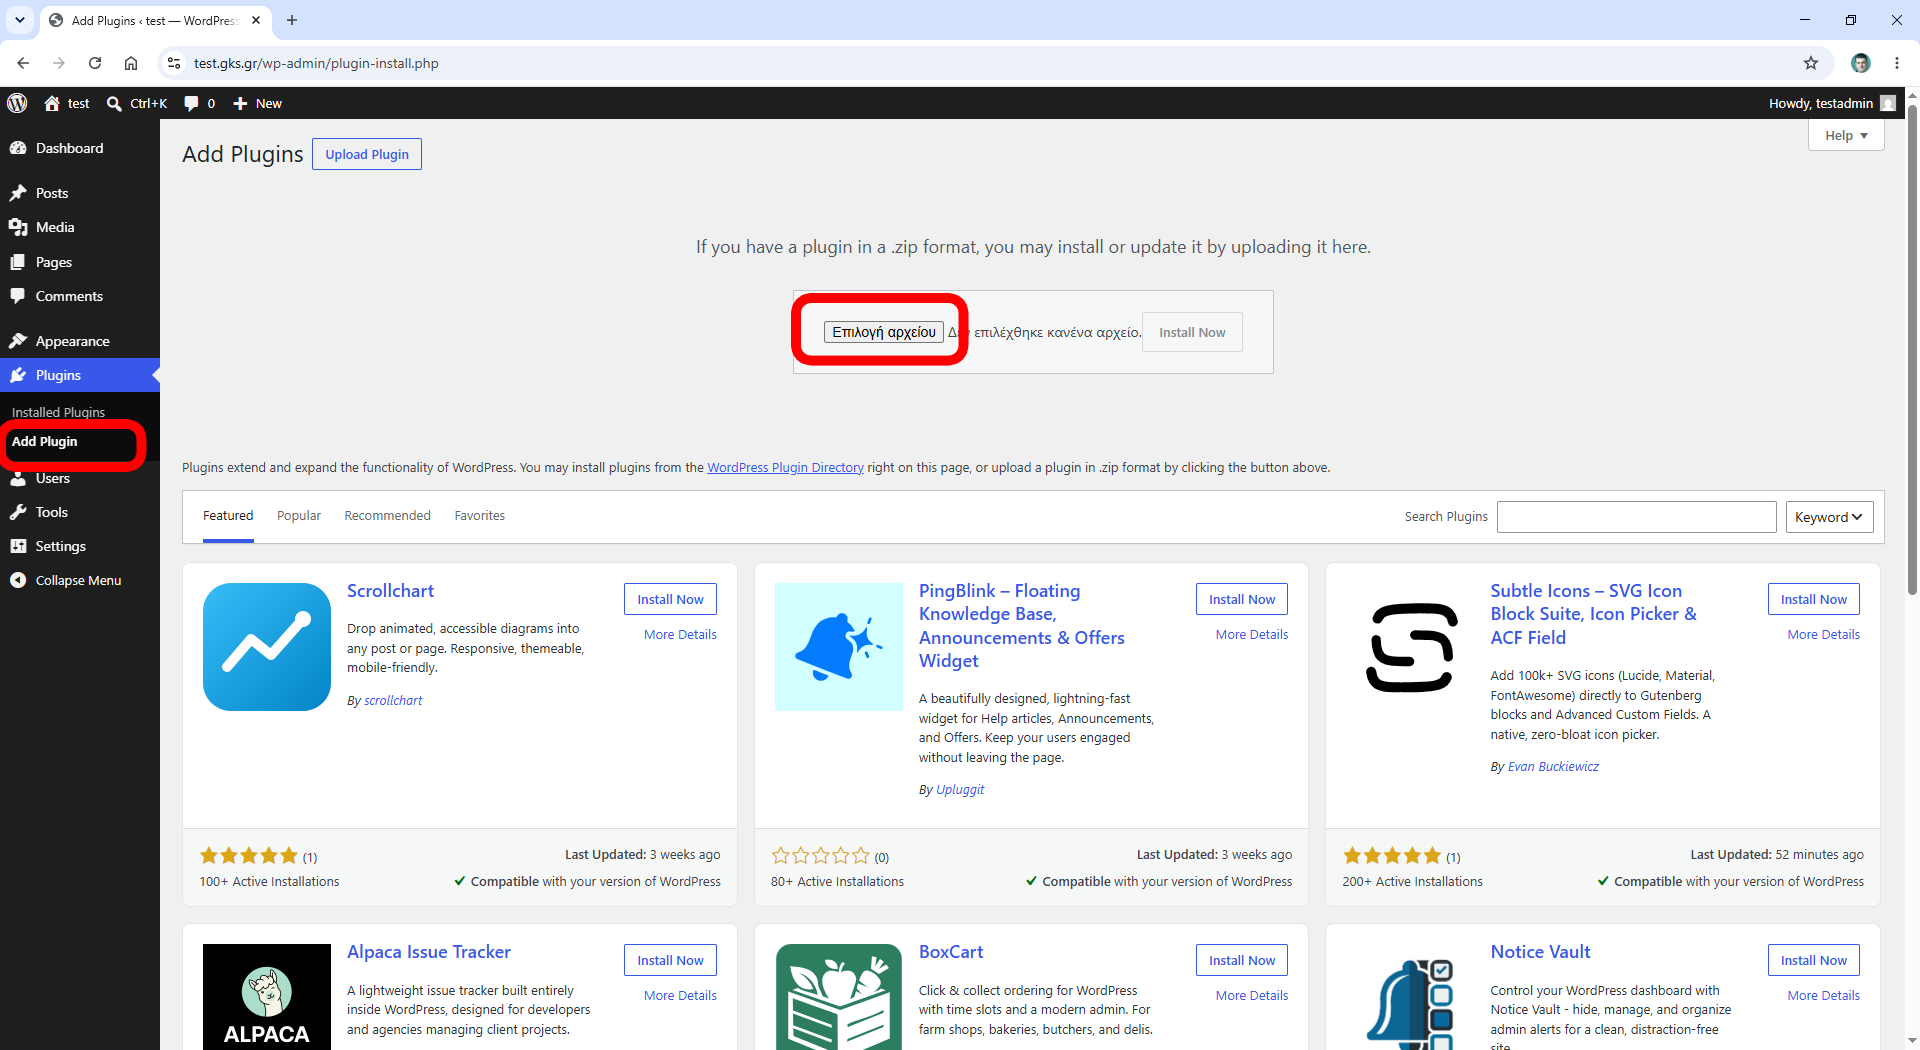
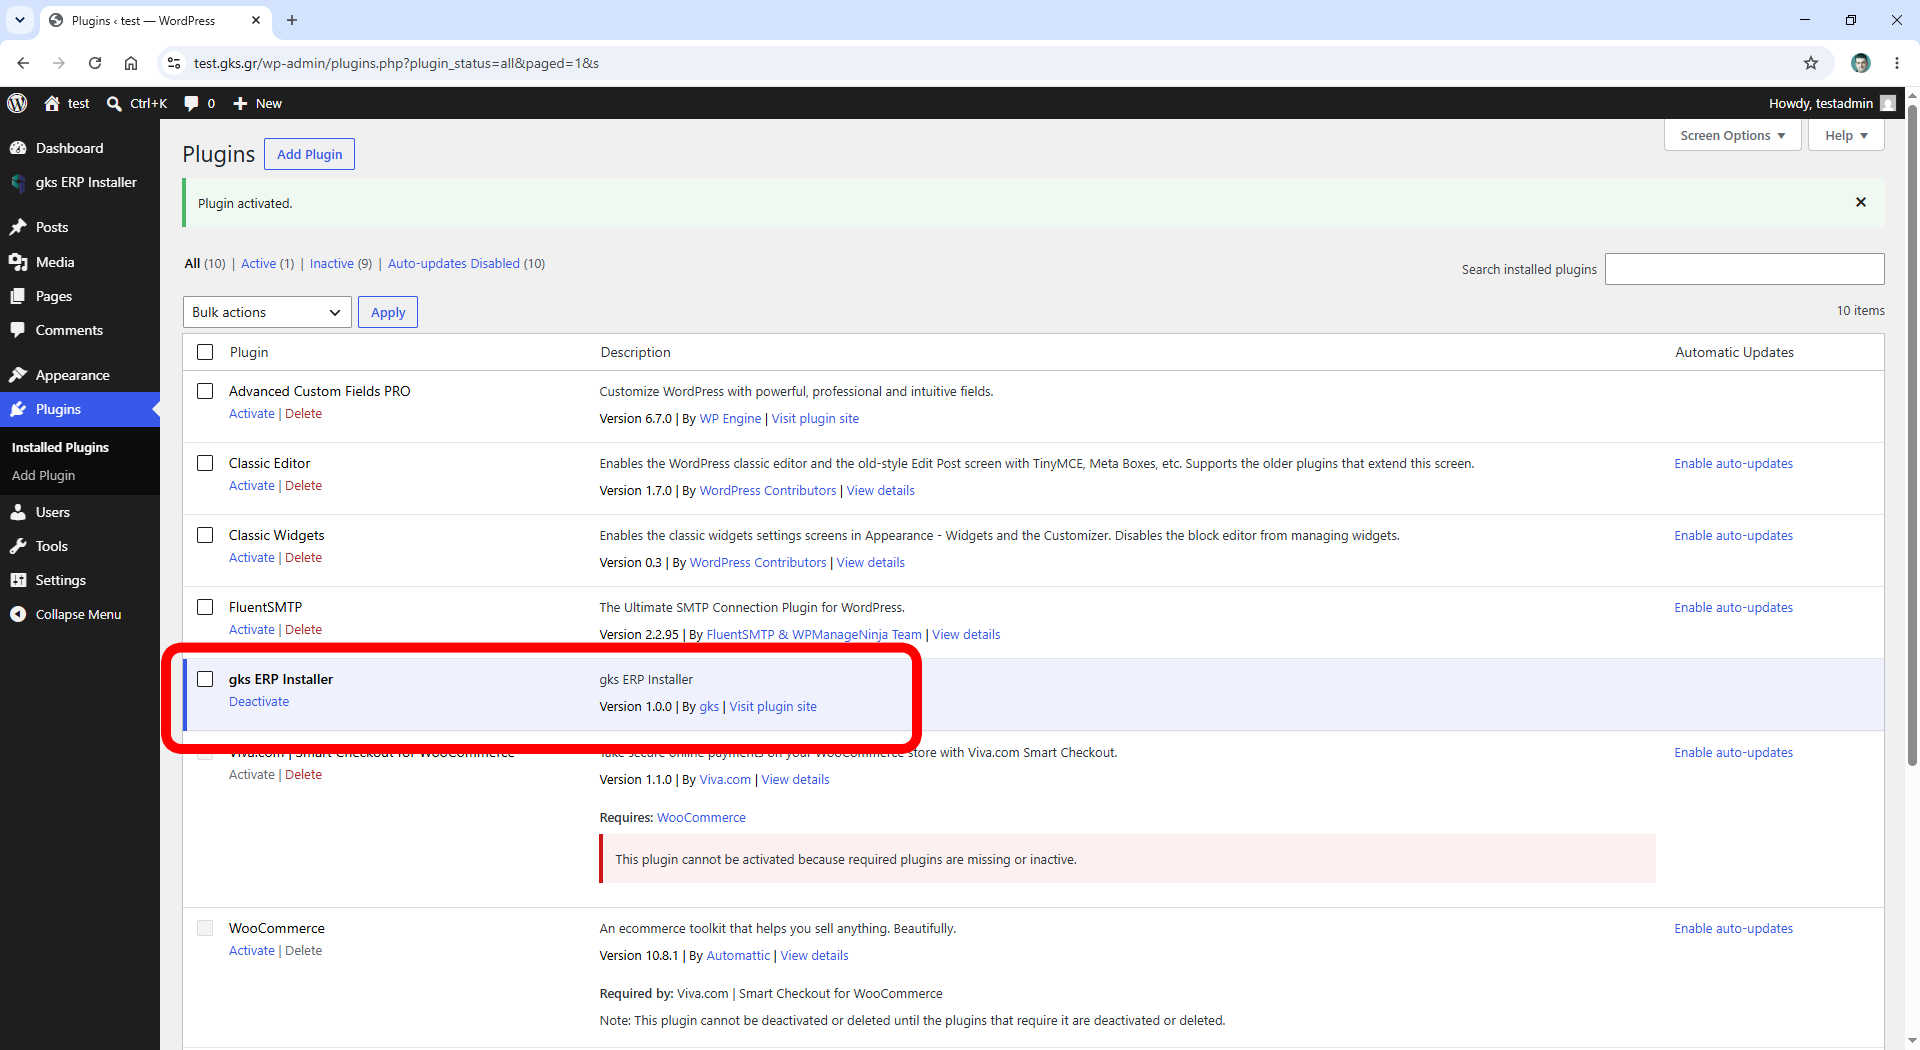
Login to your WordPress as Administrator and goto Plugins/Add plugin.
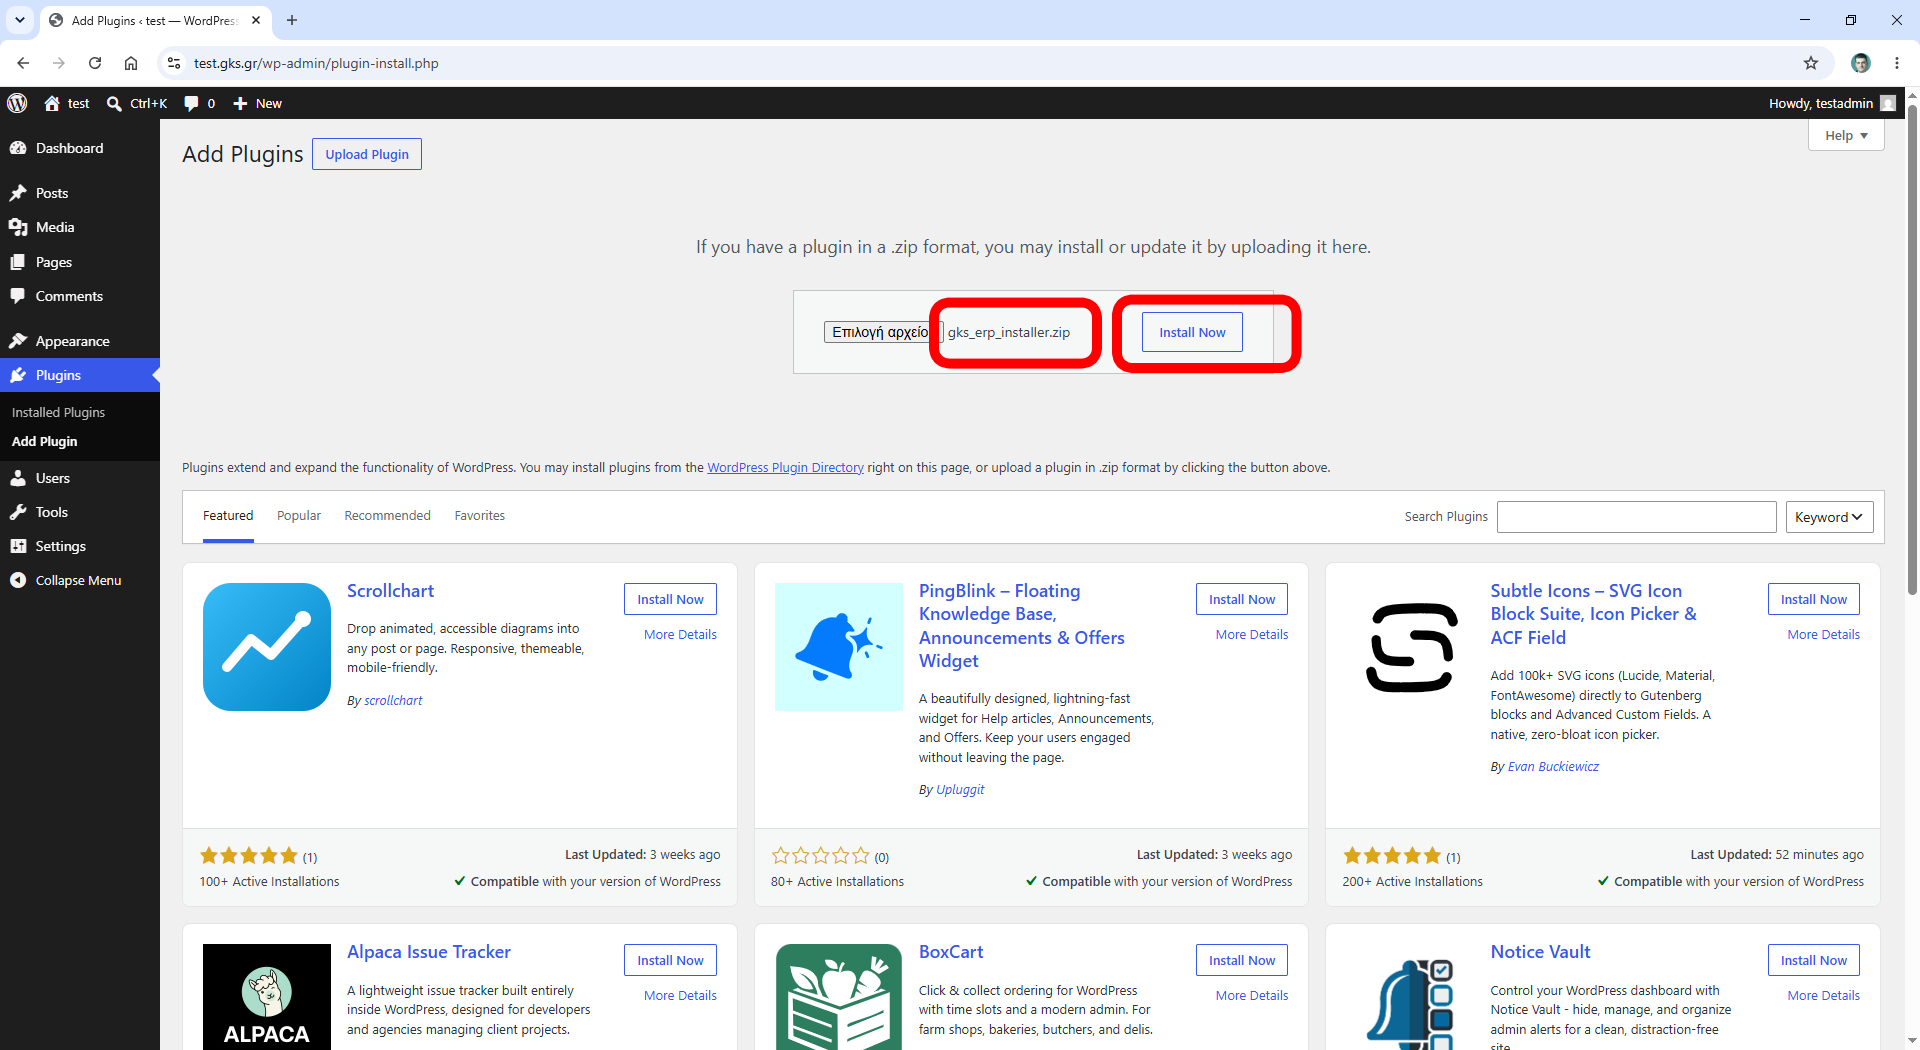
Upload the file gks-erp-installer.zip
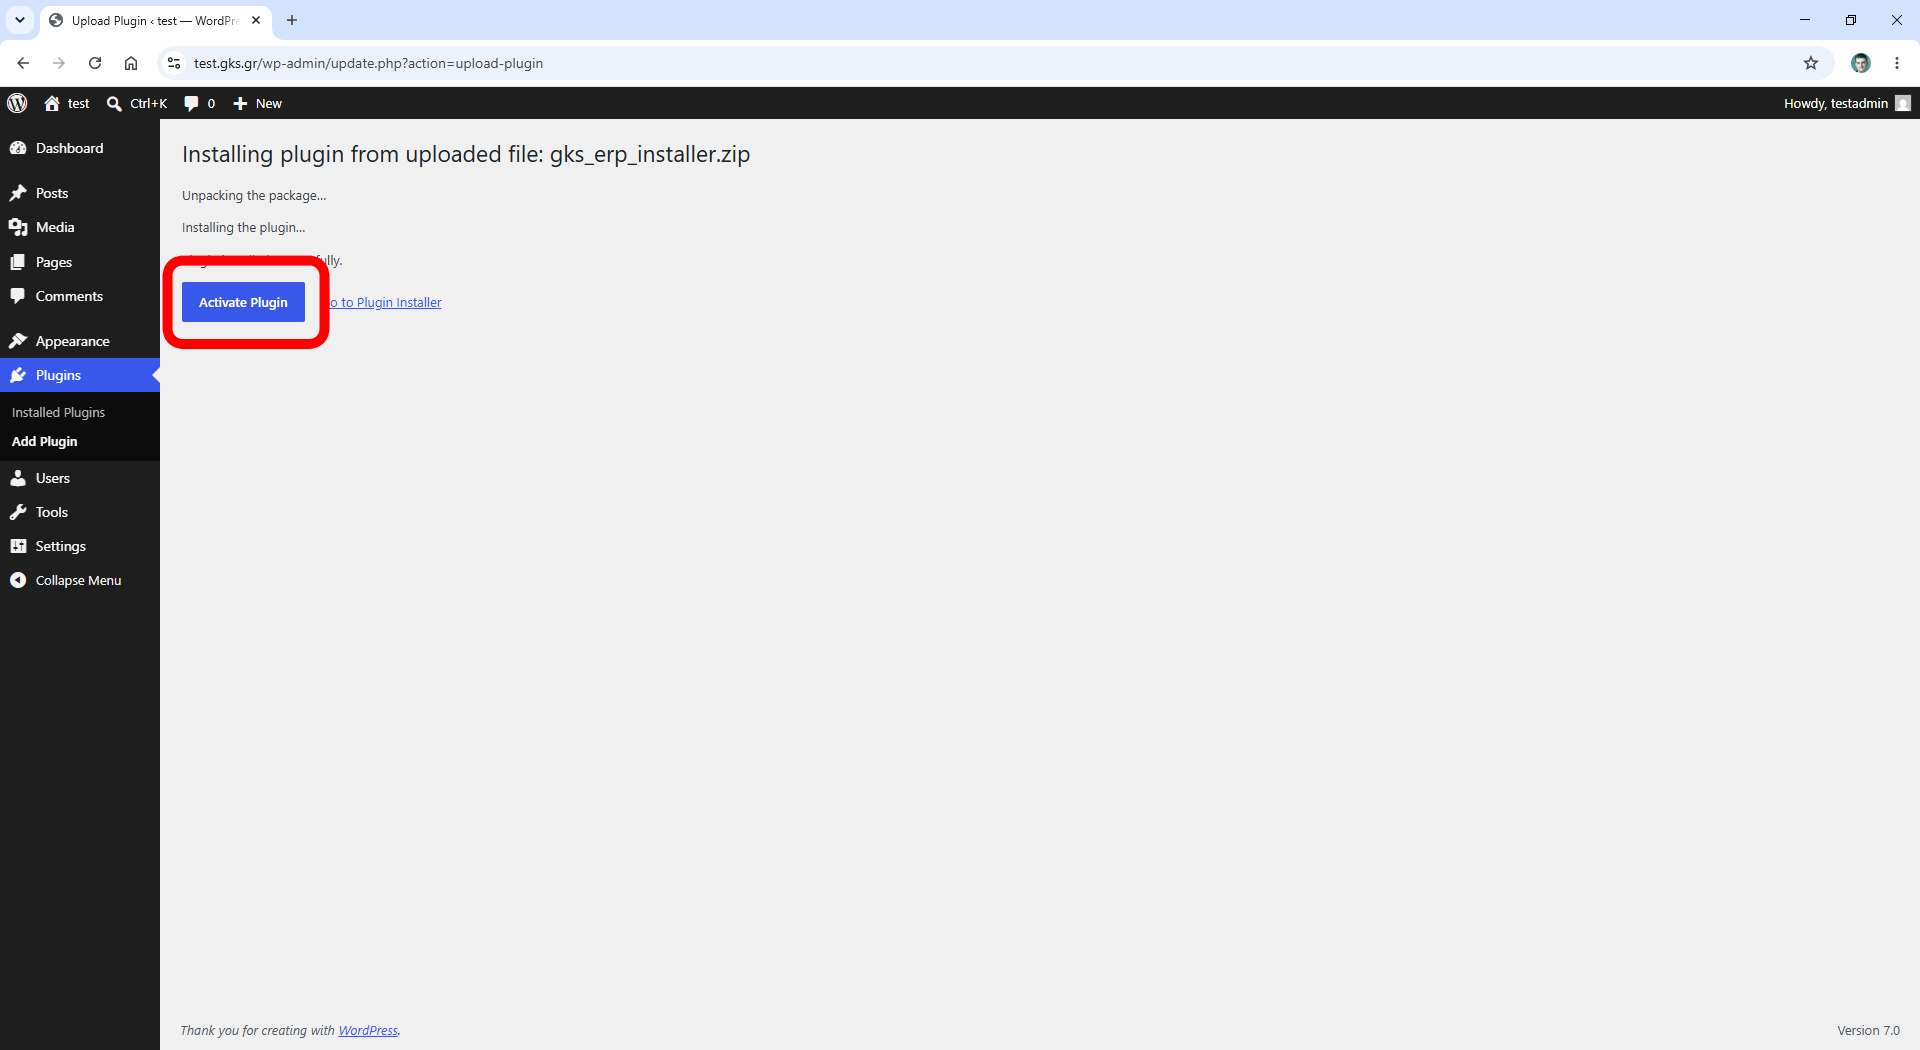
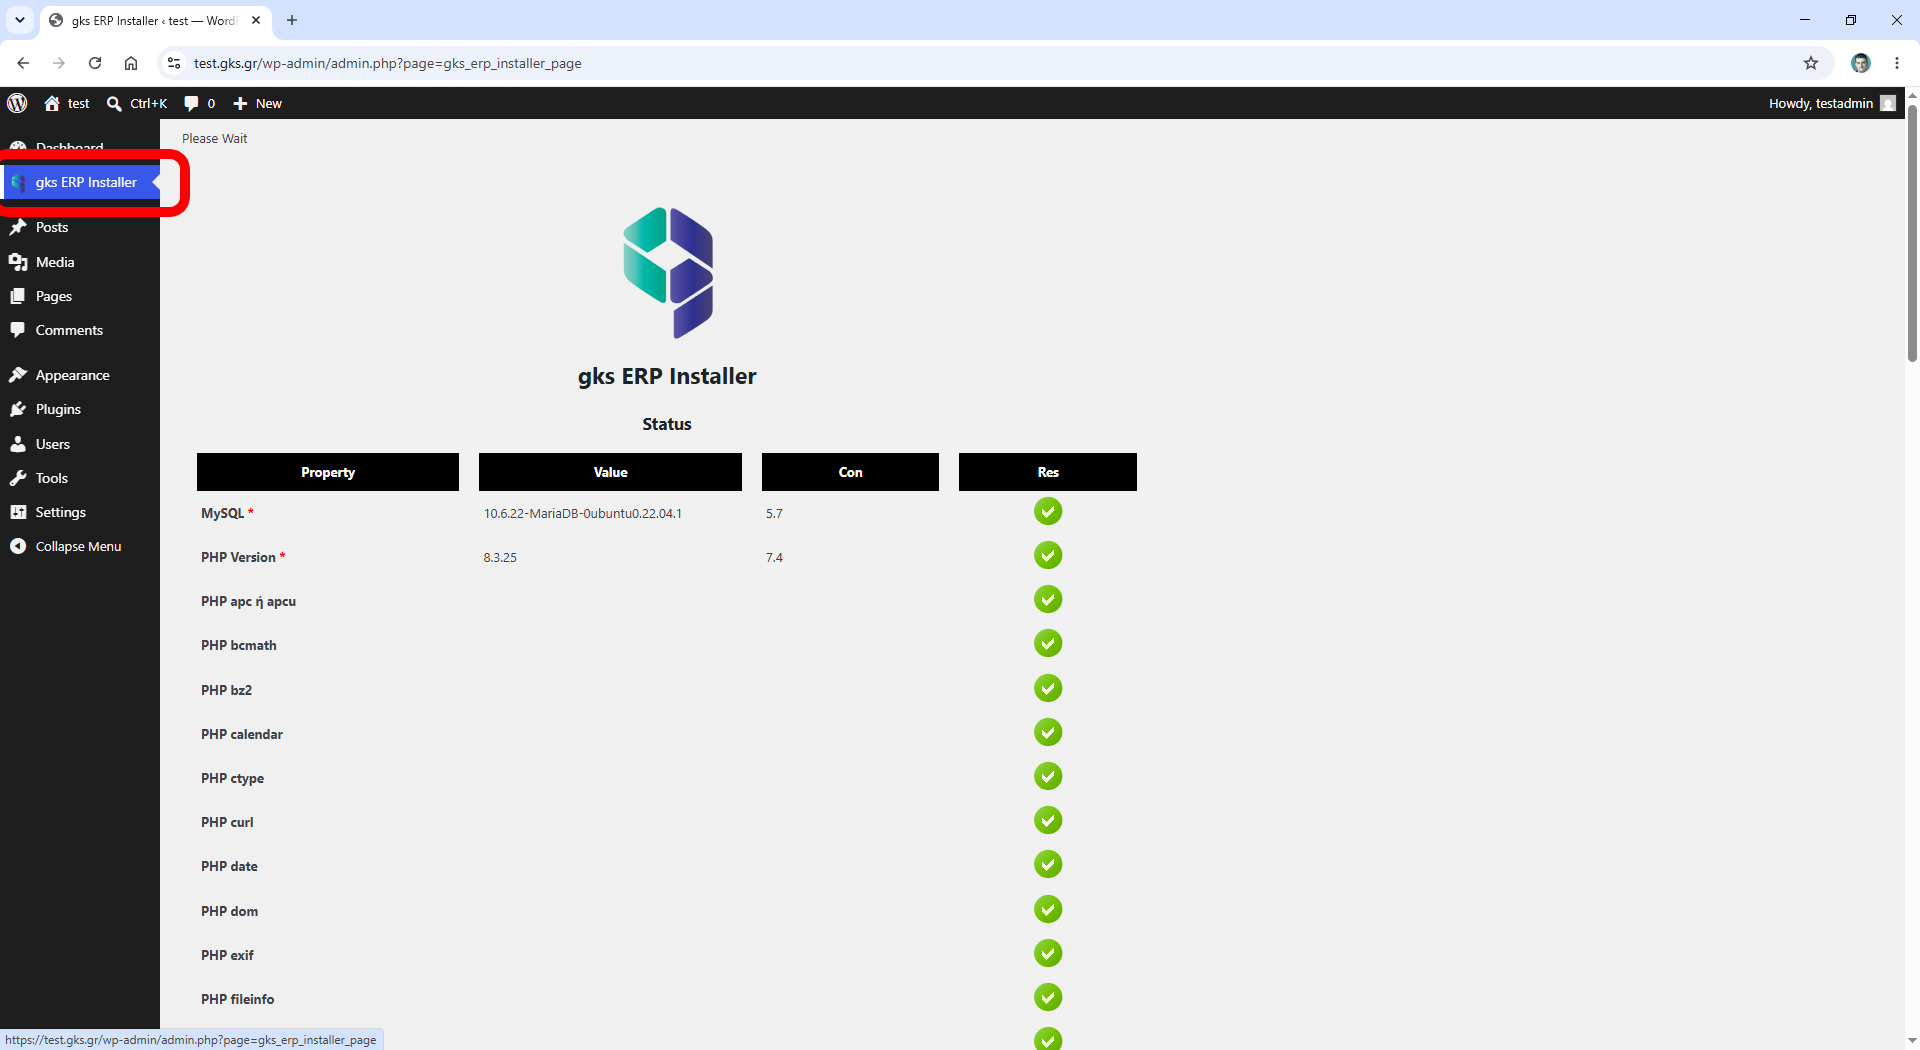
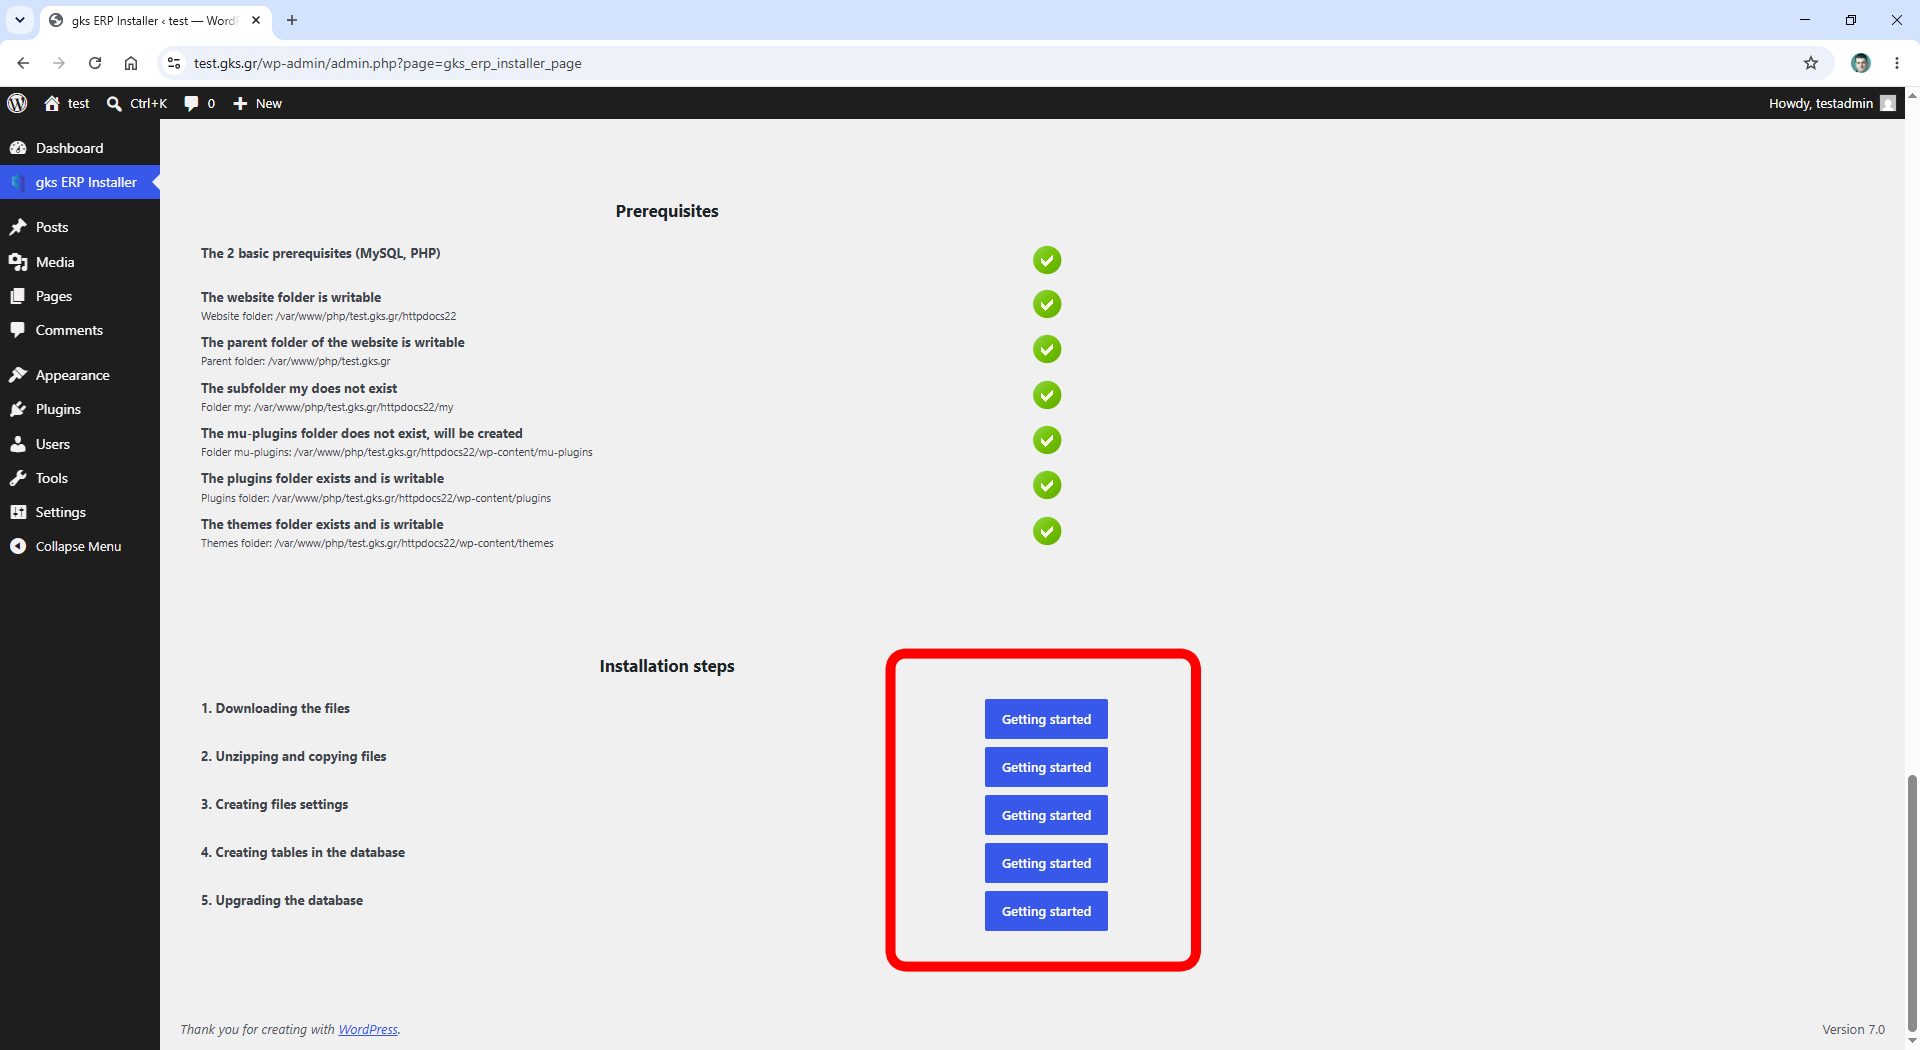
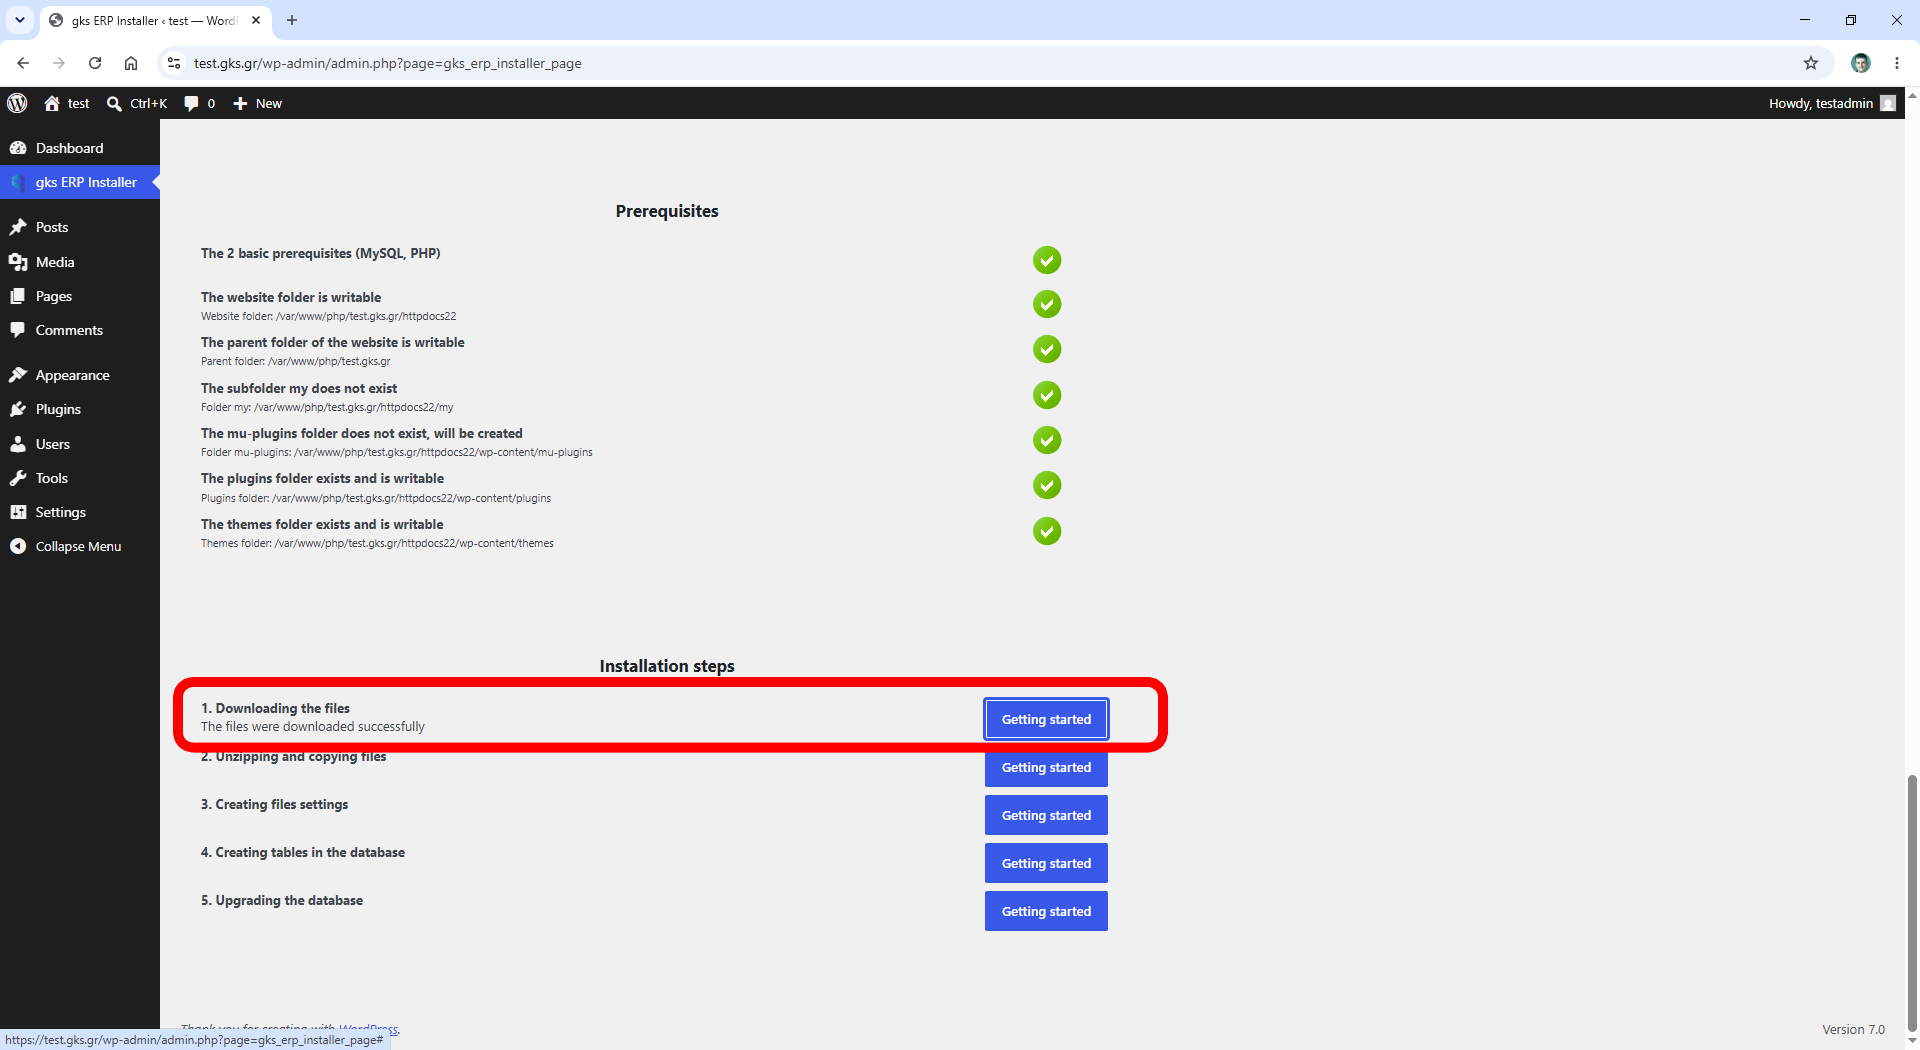
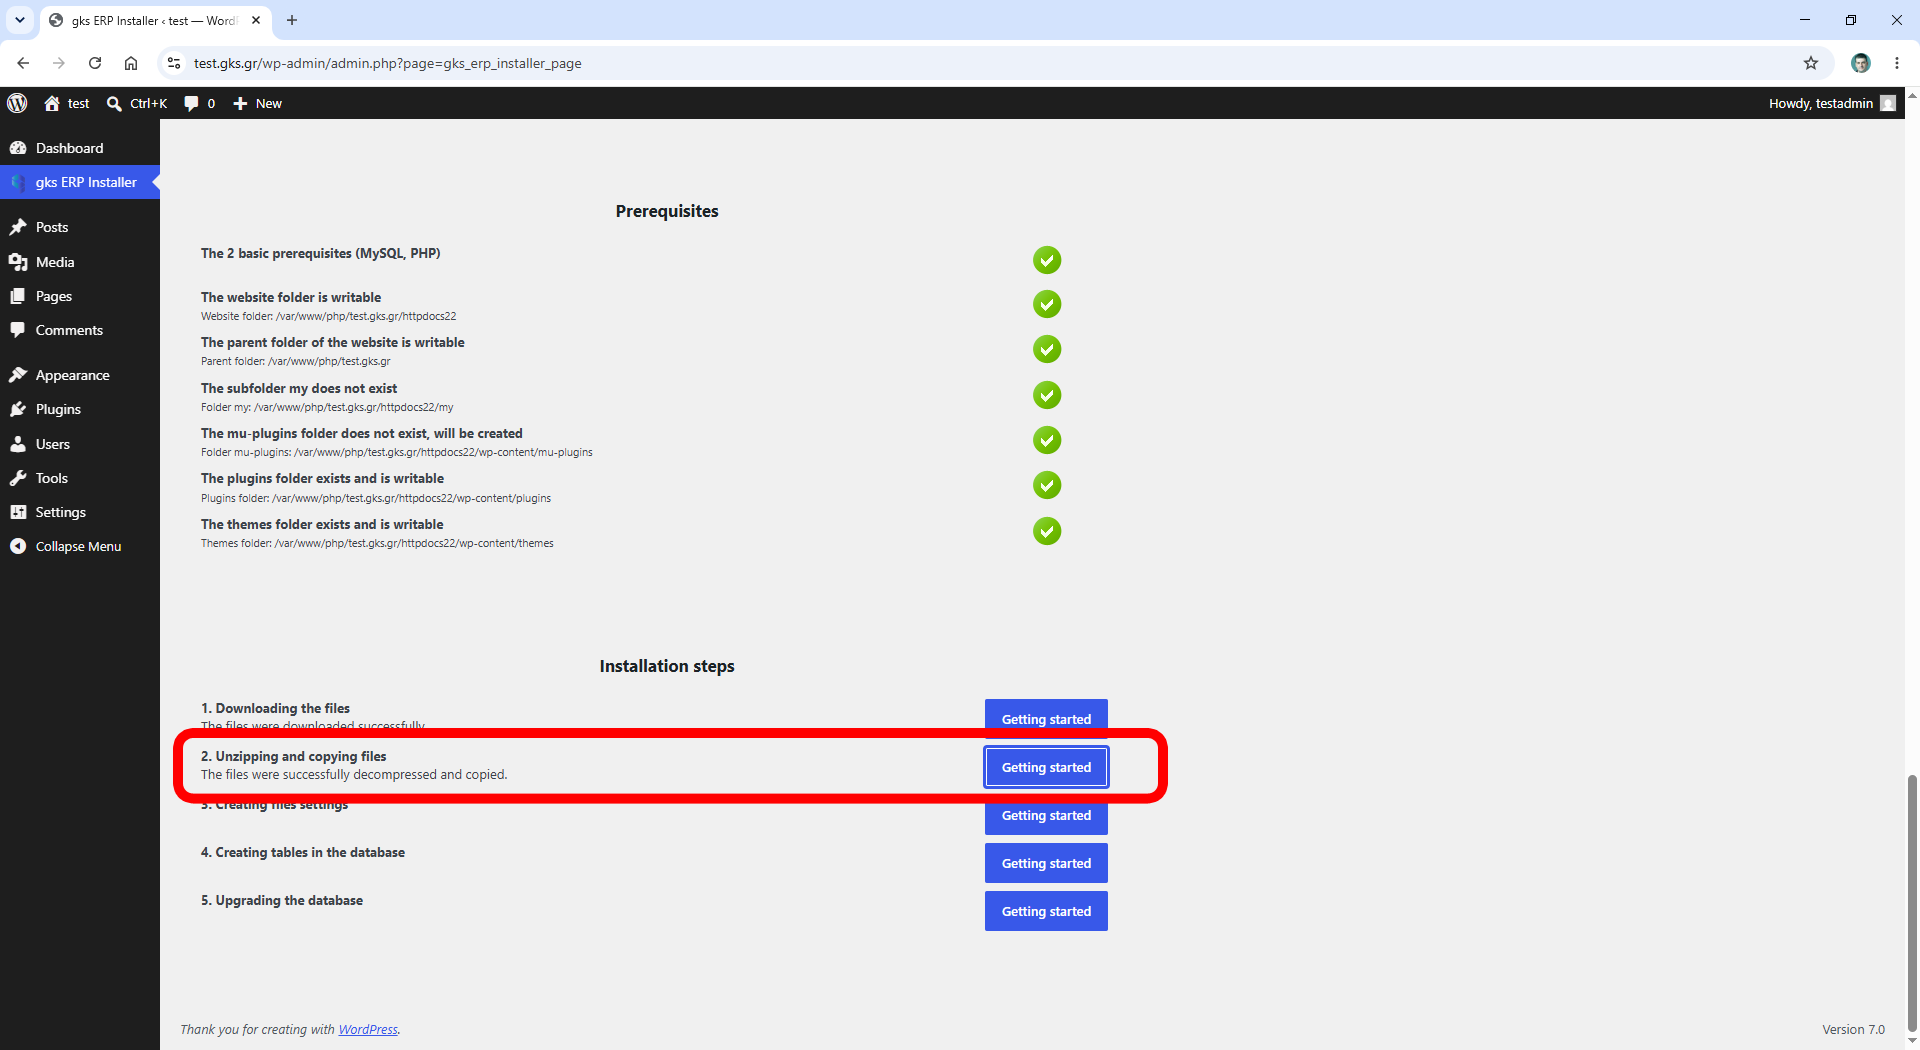
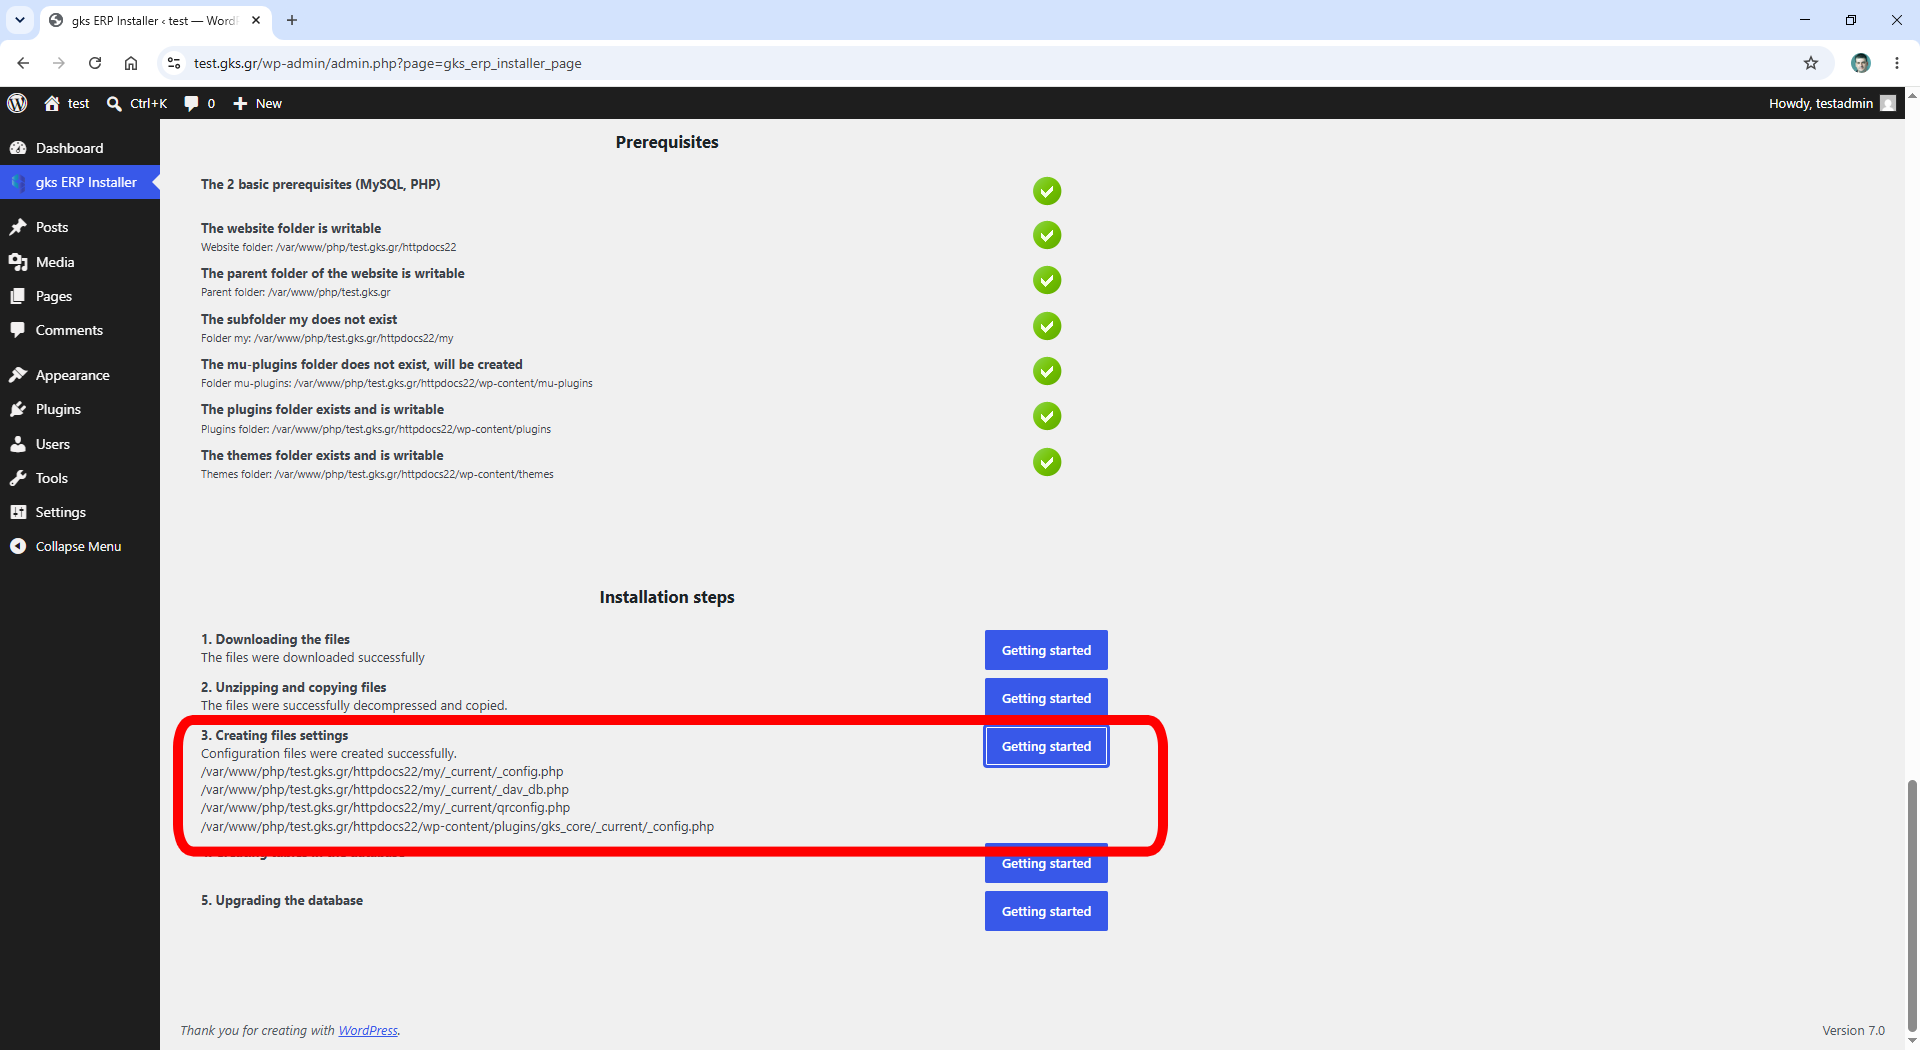
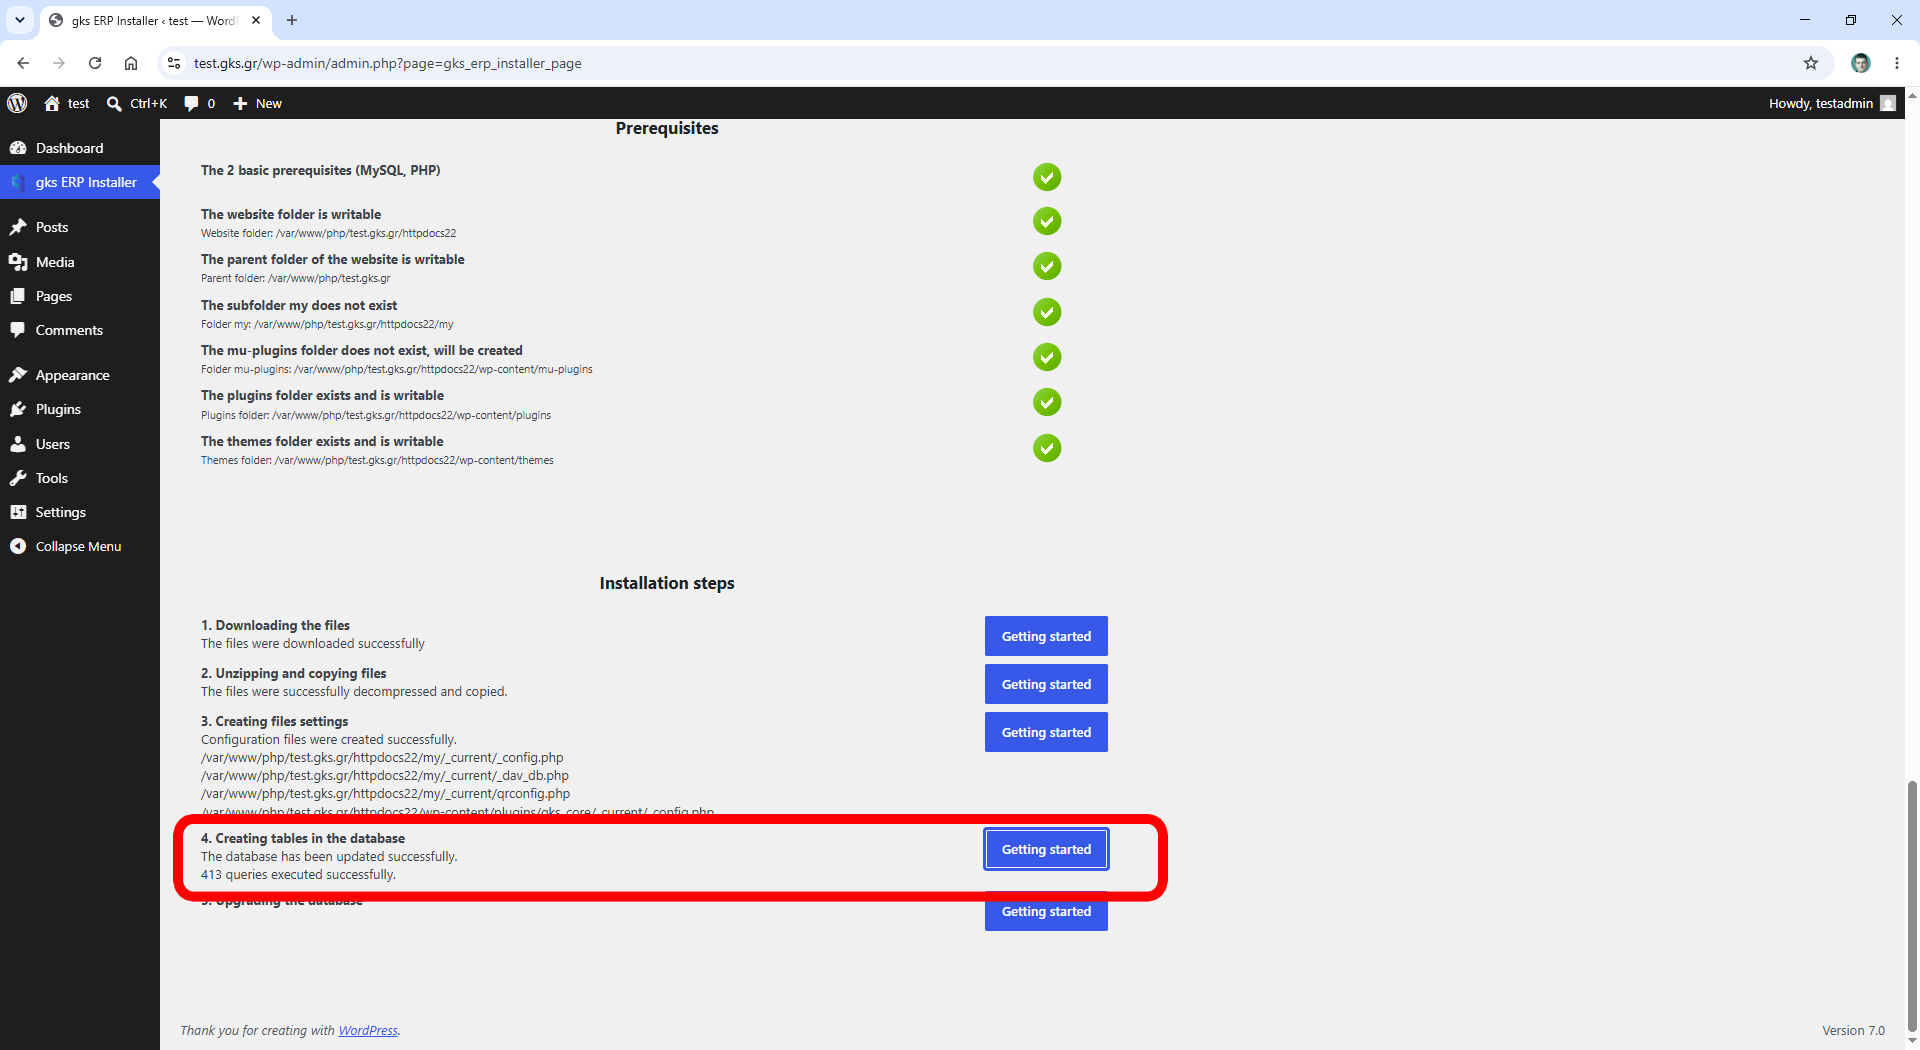
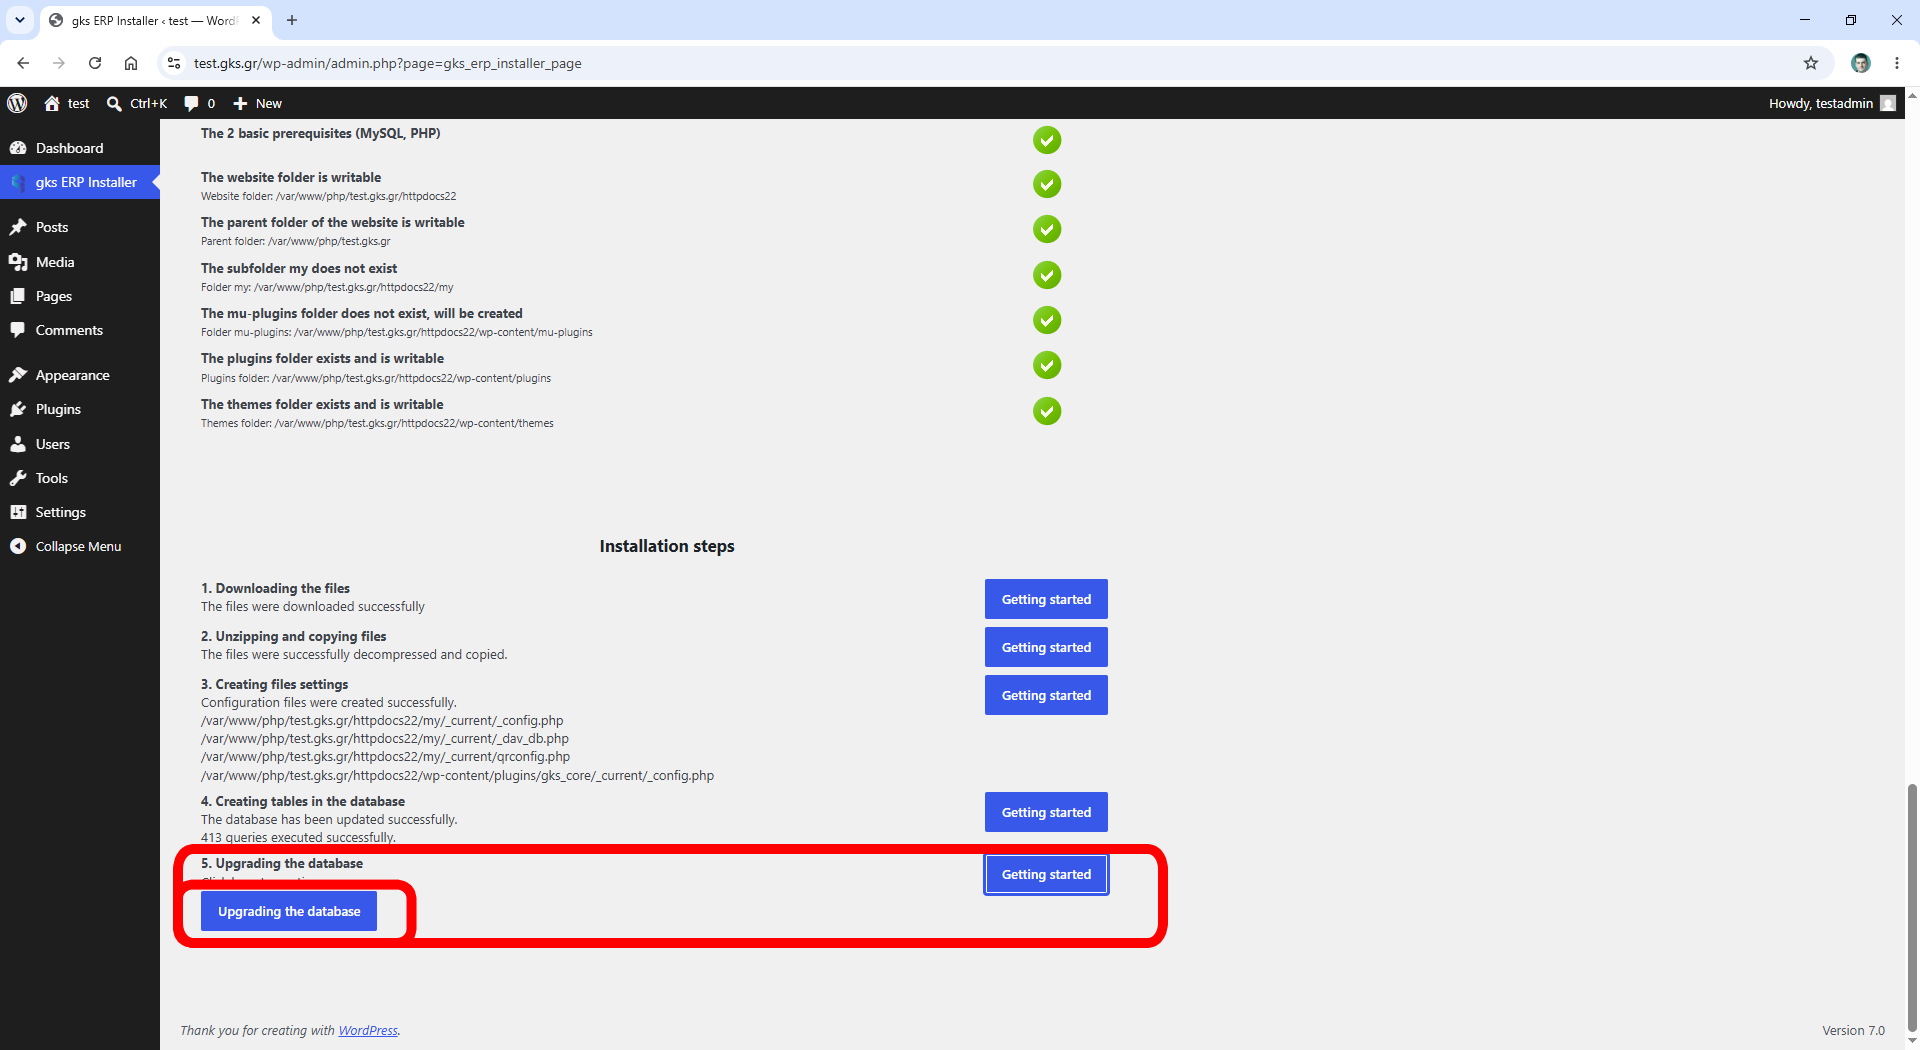
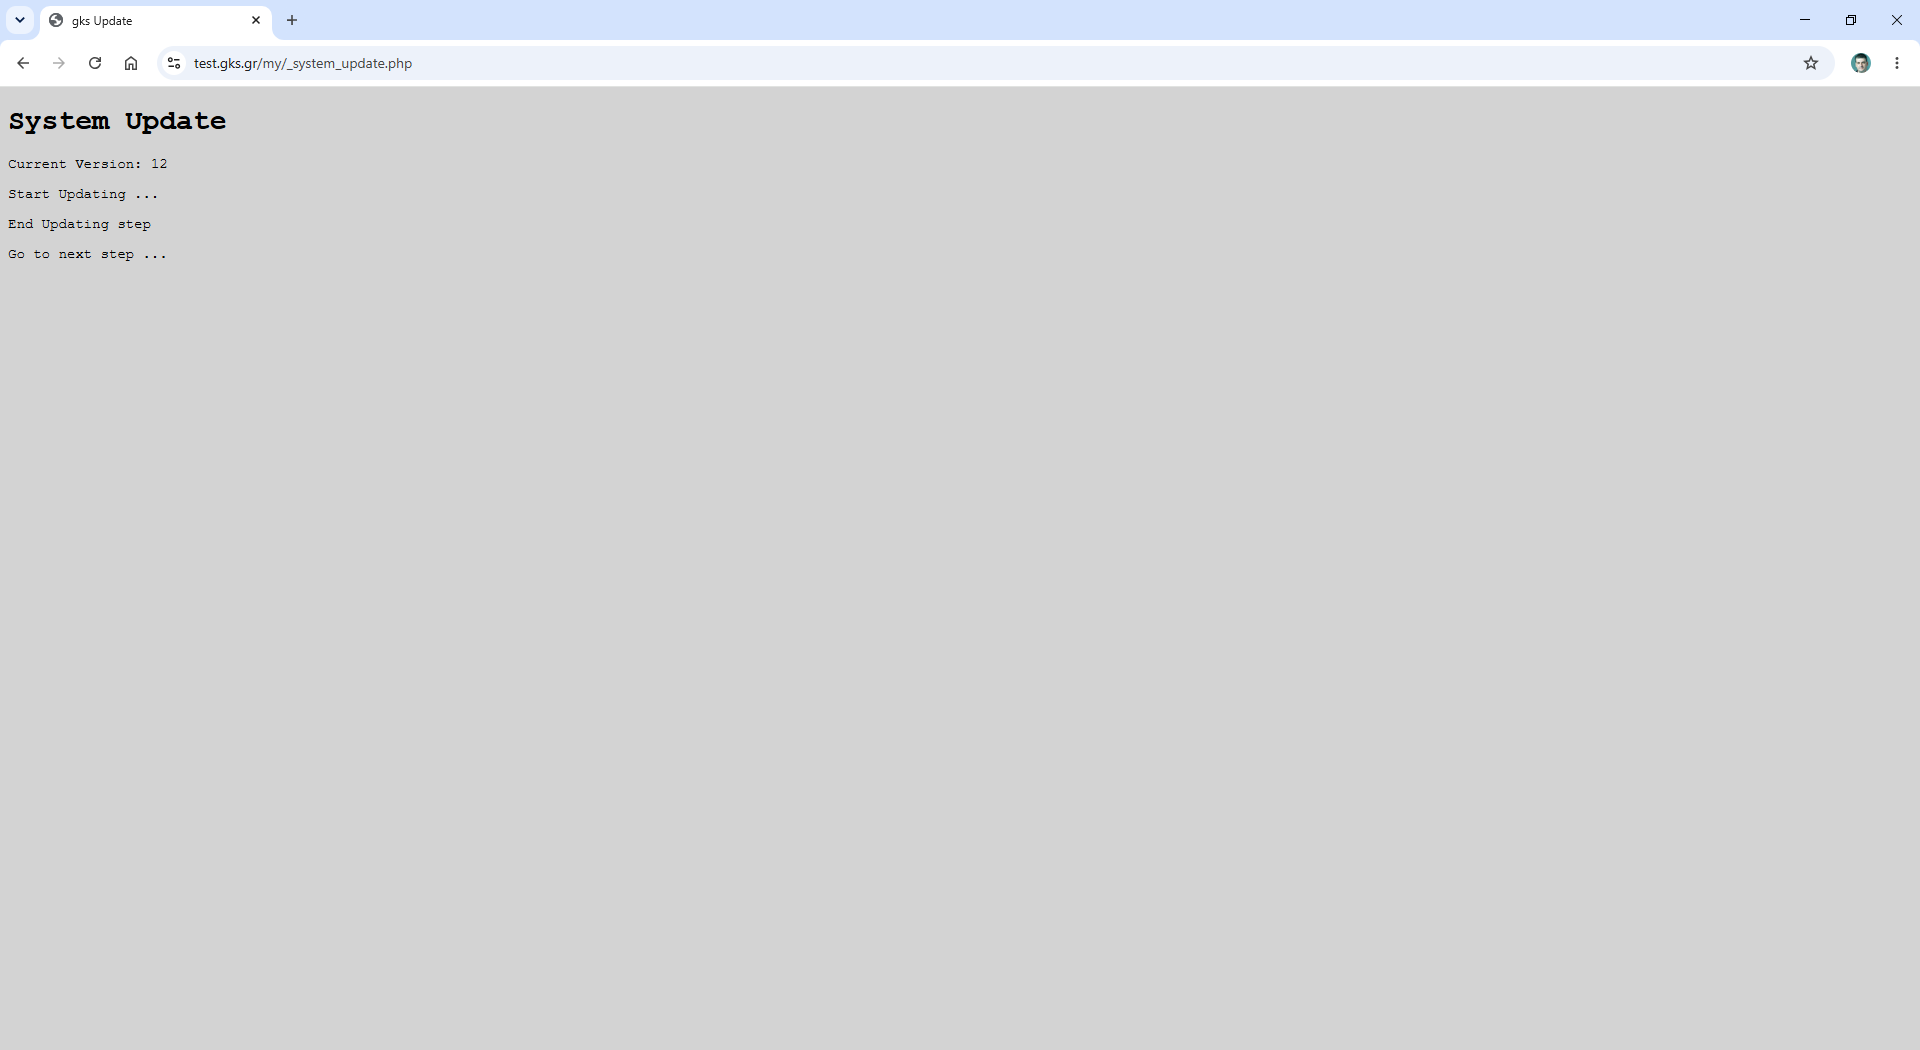
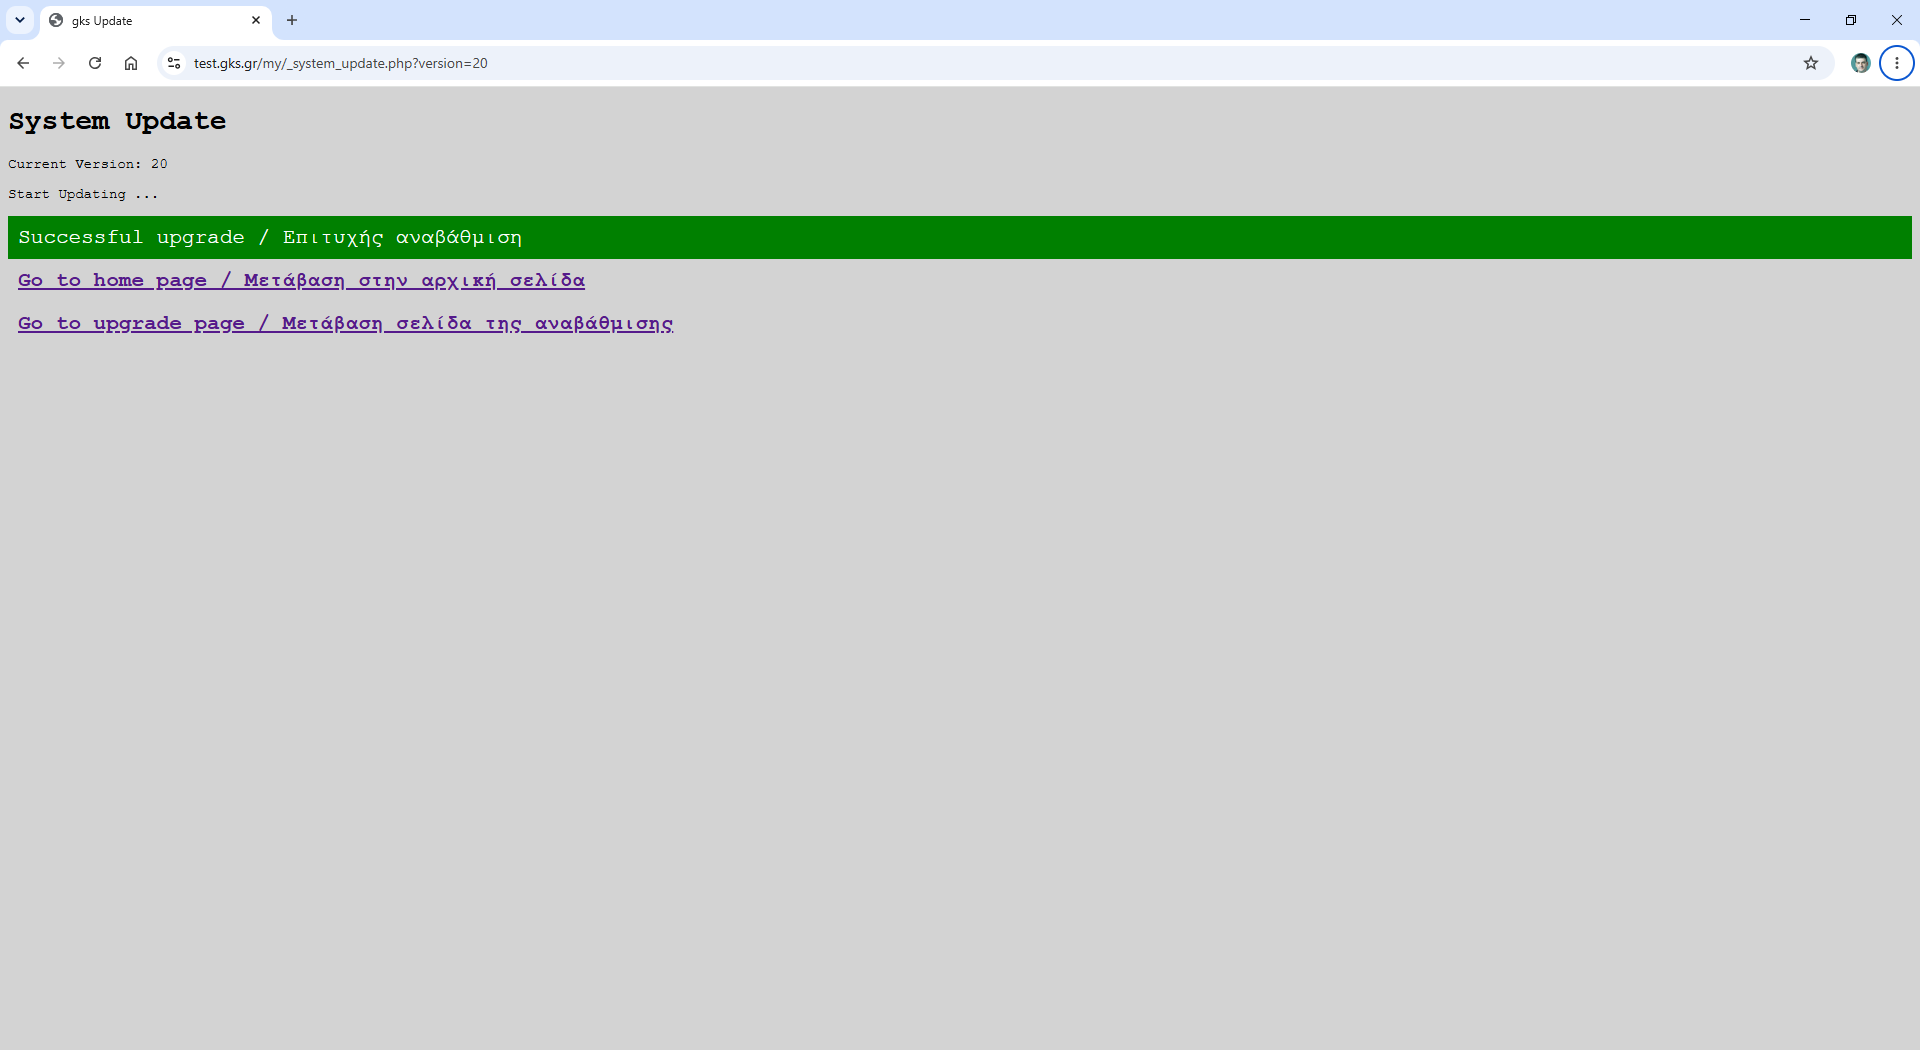
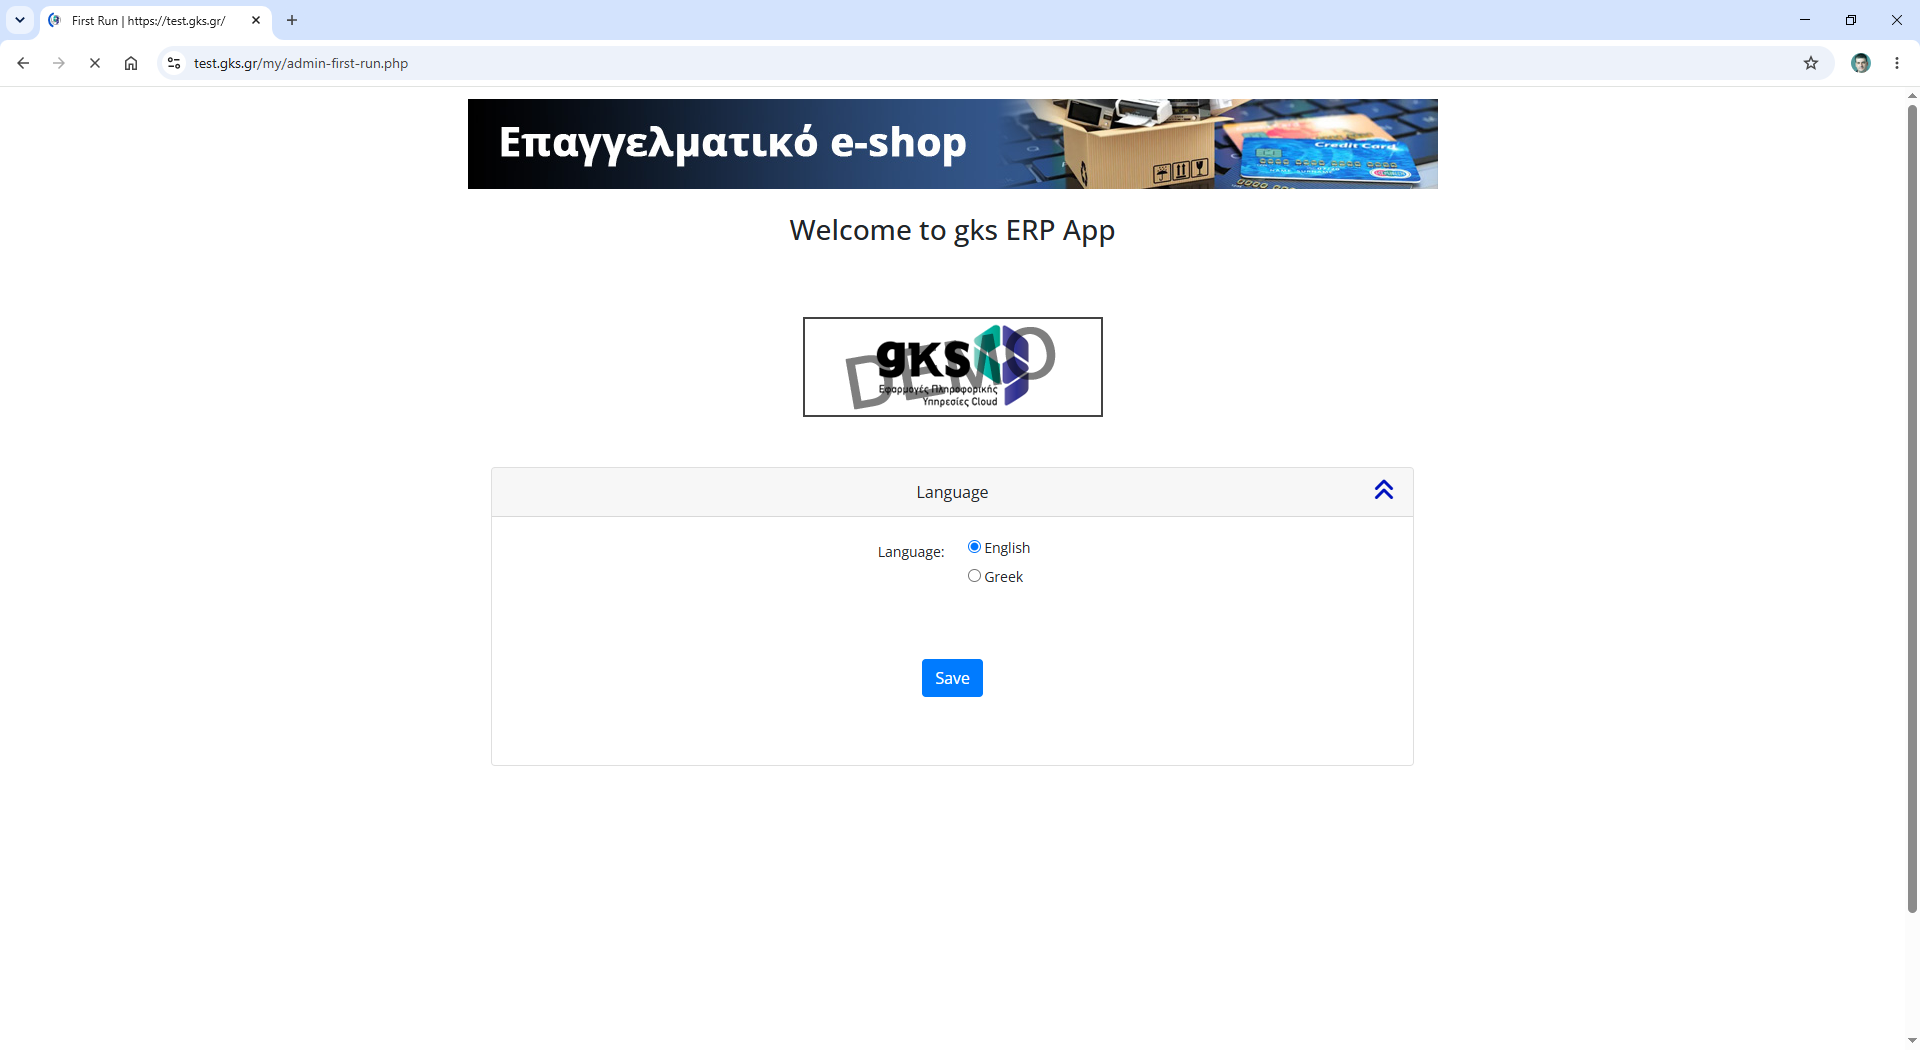
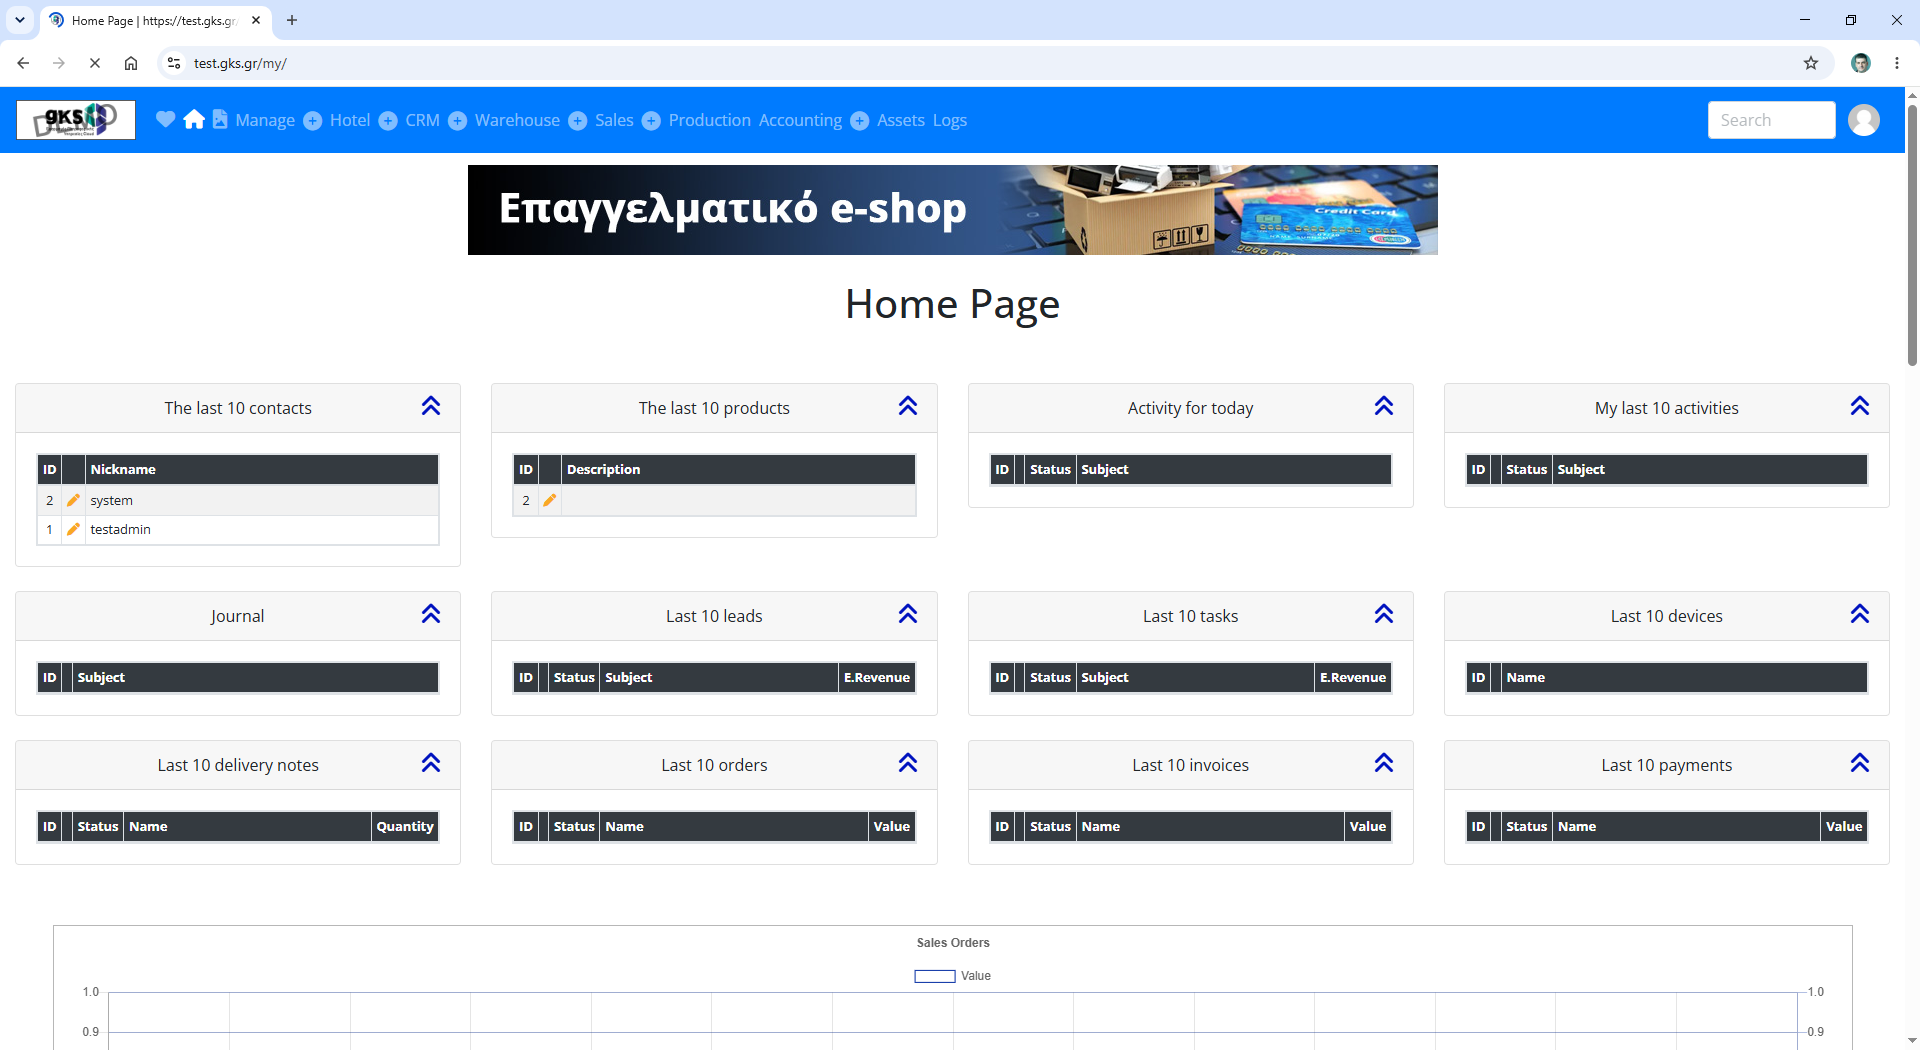
Follow the steps from the screen shots below.
After Install
The plugin will gks ERP Installer will be disabled.
You can delete it.
You can go to the gks ERP homepage at any time by clicking the gks ERP link in the WordPress admin panel.
The gks ERP homepage has the URL mysite/my, e.g., test.gsk.gr/my
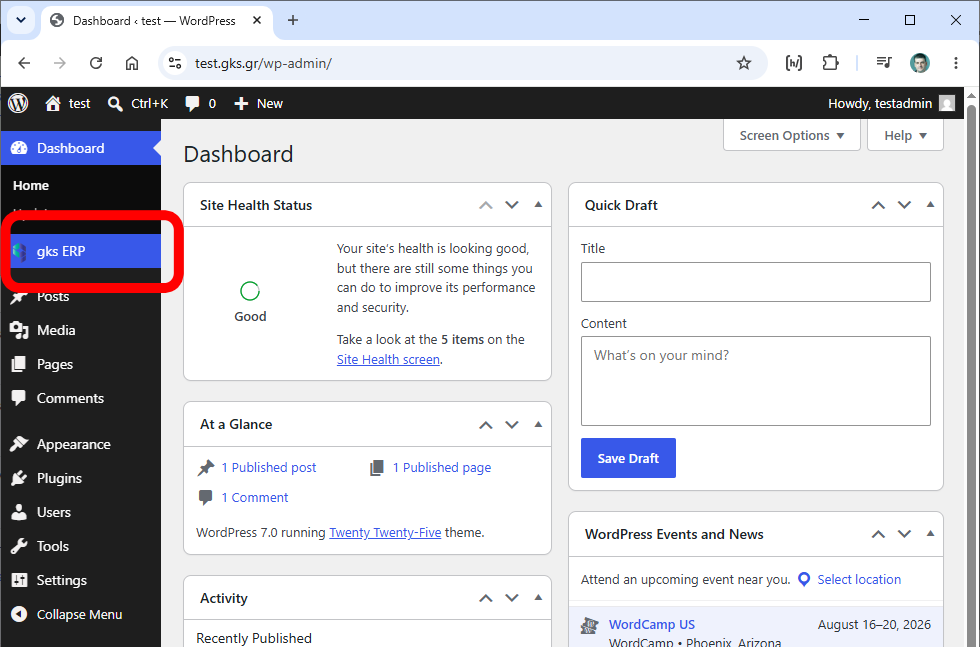
The gks ERP ready to use !